Translate

Showing posts with label Flash Photography. Show all posts

Monday, November 4, 2013

Better Flash Photography

Simplify the 

...and Learn to Take More Consistent Photographs


I don't know how much the Inverse square Law comes up in the everyday Photographers conversations, but I hear Professionals talk about it and even though many pros understand what the law means to them and the way they take photo's; it still seems to bug down there own ability to explain what the purpose of this law does and how it translates to us the everyday photo guy's and doll's.

I'm going to attempt to simplify this for all of us, Pro and non-pro alike. Most of us just want to be able to create simple images with good results with little need to think about things like aperture, ISO and Shutter speed, then add in a flash and Ugggh....


 "Wait can you make another wish grandpa I need you to blow out the candles again because I didn't..." 

I didn't, those words haunt many a photographers, all because of that evil 'f'' word. 


FLASH


Let's make it simple, below are a couple of charts that I created to help me keep a more consistent image and I decided to share them with you in a .Jpeg format that can be easily downloaded.


Anyone who understands the Inverse Square Law is going to find my simplified thought quite annoying. But it may help you to explain the Law to someone else.


Here are two definitions... 


Science—when a light source is moved further from a subject,  or a subject from its light source its intensity reduces by the square of its inverse. Meaning the amount of light on a subject will be the square of its inverse of 22.
Simple—Light falloff is relevant to Light distance.

This first chart is a quick reference guide I have memorize. It makes understanding the science on a little bit simpler terms; BUT ITS STILL BORING, so if you don't want boring skip ahead to the next section now, unless you are looking for a good nap, and this should be where you keep reading on. 

Just about anyone can tell the difference between two, four, eight feet and so on. Using this simple diagram has helped me to understand and quickly reference how to set up my flash to change the shadow effects of the image. It helps to avoid the ratio battle and confusion that comes from using flash and multiple flashes. 


Let's suppose I place my flash on any power level I want to and place it 2' from my subject, well we all know that it is going to be very harsh and quite unpleasant to look at in most cases: so I move it back to 4', now the same flash on the same power level with twice the distance only about 25% or 1/4 of the light will reach my subject, lets move it back even further to 8', now the same flash has only 1/16 of the light or about 6.25% of the light will fall across my subject, and even further to 16', now that's a mear 1/64 or 1.5% of the light that I had at the original 2' distance where I started. 

Using this method, which is the Inverse Square Law, any distance can be plugged in: feet, inches, yards meters, whatever your comfortable with or whatever the situation you find yourself in this will remain constant. Something so simple as moving the flash distance can change the effect of shadows in your image. Foreground or Background. 

The Easier Setup...


What I've done with this chart, based on Speedlight's (or speedlite if your a Canon photographer) manual settings I've developed a very simple chart for what Power setting to put my flash on based on how far I am from my subject. 

Camera is set at ISO 100 or 200 and shutter speed is set at 100 or 125th on shutter priority mode this lets the camera adjust the aperture. It's a great starting point and its based on doubling the distance. Helps to avoid chimping (looking at the histogram and LCD screen after every photo capture) and is much quicker than those methods. 


I do recommend that a light meter be used when possible, but that's not always the case when we don't have our gear or photographing something like Christmas, birthdays and family reunions and other holidays and such. 

My recent self portrait was done on 1/32 power at about hands distance away and in a lit room, this image acutally ended up being my last one, once I got the shot then I was done then I did what I wanted to well actually I spent more time writting my blog...

Keep shooting and as always Happy Shooting!


Monday, October 28, 2013

Outdoor Lighting Tip

Shooting into the Sun can be Fun


This past Saturday I had the opportunity to do some street shooting, albeit a different kind. So I took up the challenge packed light and headed downtown for the Newbo Chicken Run a 5K costume race. 


The Gear

Since I knew I'd be walking a lot, I needed to take minimal gear so I choose my camera, two lenses a 28mm f/2.8 and the 18-55 which I didn't use. I also had my Speedlite and 3ft. sync cord, with a gel on the flash. The gear I choose was dictated by the shot that I wanted to get.

I knew already that I wanted to shoot into the sun. There were several factors that led to this decision, the time of day for one; it was around 4 o'clock p.m., so I knew that the sun would still be a bit harsh yet, I had it right where I wanted it.


The Problem/Solution

I obtained a course map and then printed a more detailed map from Google marked with Landmarks and other interesting areas of the route that I felt would provide me with interesting background material or image subject matter. I took both of those marked up maps with me but not before I had picked a couple of spots to photograph from forehand. In a short 5 kilometer race like this one I would only have one or two locations to photograph the runners. Determining that I wanted a shot into the sun helped to eliminate areas that I didn't want. Next I had to choose between area's of the race course that where close together and Landmarks that I wanted. 

A race like this with so many persons and all dressed in costumes excited me, I knew that I didn't know what I'd be getting, even more so I liked the fact that it all wouldn't be the same. However that also increased my opportunity to miss the shot, with so many different characters who knew what I'd be getting and how long would I have to wait in one position before I could move to the next?

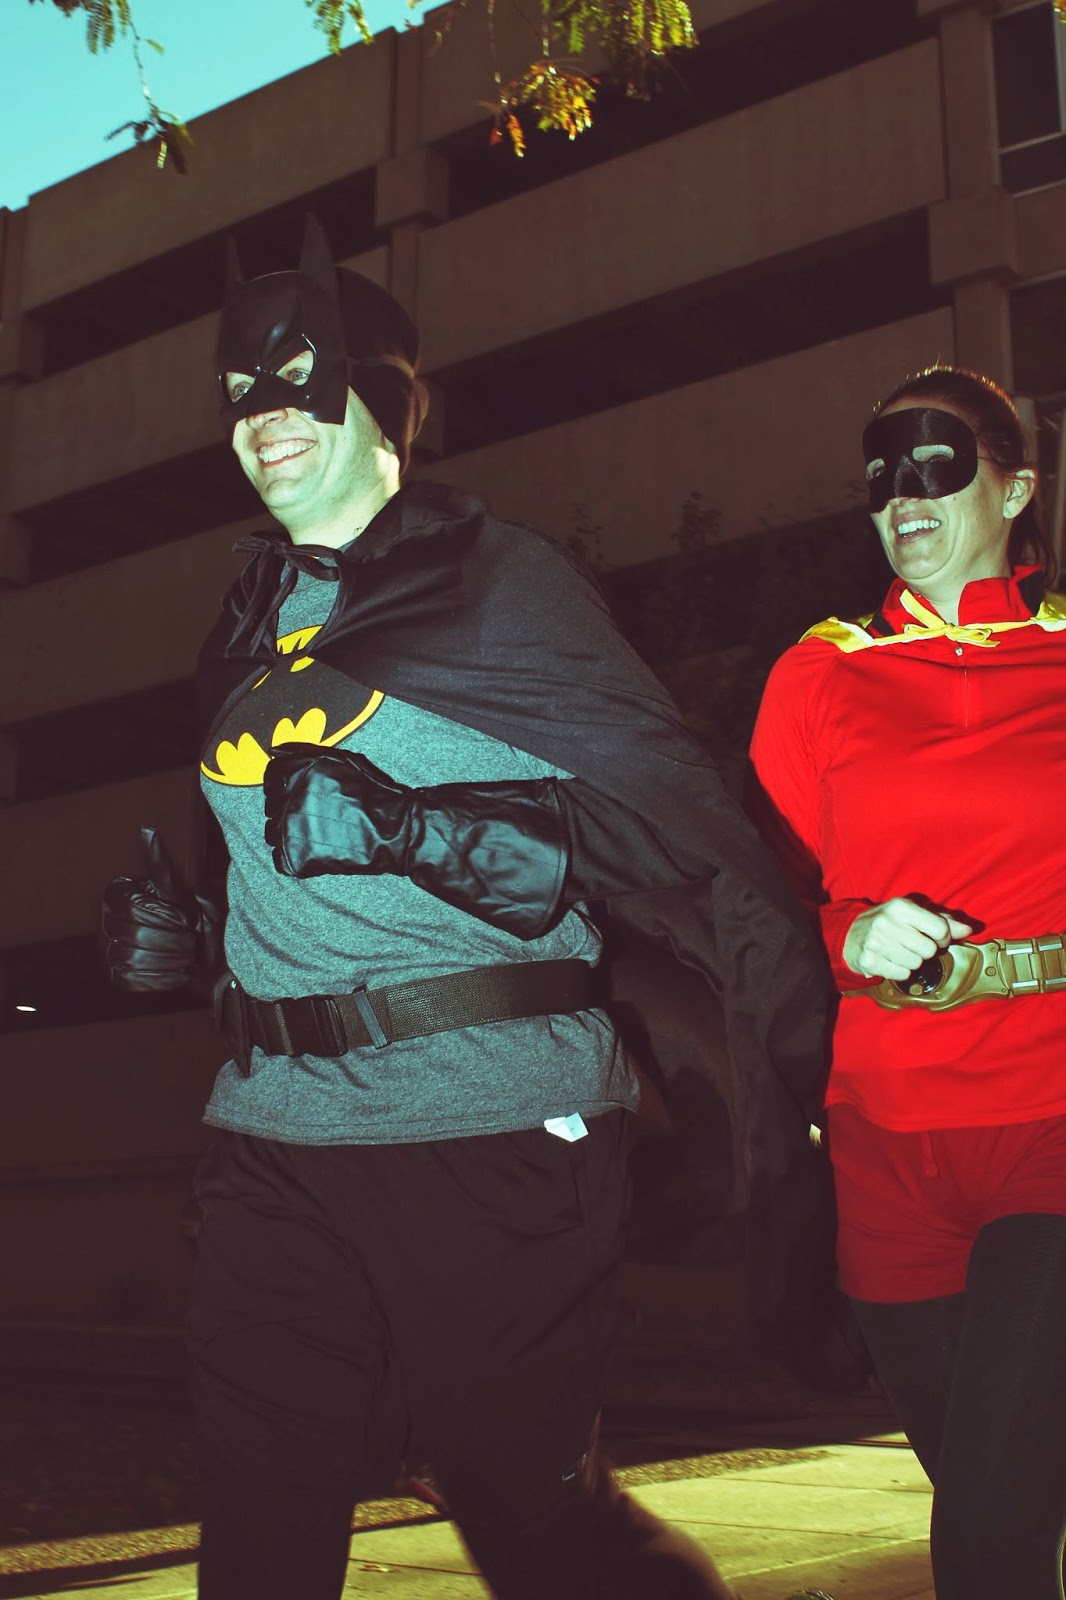
Here's The Shot_ One of Em'

You can find more from the album on Google plus here Chicken Run Photo's 

 Image 1
same as last Image 5 but with flash turned on blue gel removed from the flash

How I made the Image


First things First

I not only wanted to photograph into the sun I also wanted images that looked discolored, but I wanted to do this in camera not afterwards. I wouldn't be shooting in RAW and I would be using medium Jpeg files because these images were just for fun and wouldn't be leaving the web. 

Beside all that I have been experimenting with in camera ways to create digital Lomo and XProcessed or Polaroid type images. At lease things similar. 


WB +/- Shift Bracketing

In Canon camera I used a custom WB setting which I had preset the day before, adjusting this from a sepia photo which had the WB off because I photographed an image using the "wrong" or incorrect WB. Then in the menu setting   WB +/- Shift Bracketing I moved the correction settings around to give me a more blue and magenta color. All this was saved and shot from one of the camera's presets menu.


Flash n'things

The in camera settings gave me the images I've posted below; I covered my flash with a blue gel, it turned out to be to much blue so I decreased my flash to 1/4 power and that helped but then for a different effect I changed the custom bracketing back to normal, then I ended up taking the blue gel off the flash entirely. With each new location I went to the setting change so my camera settings changed also, for the image above I incresed the flash power to full. I knew how entirly important it would be to use as much flash power as I could get shooting into the sun.


 You can find more from the album on Google plus here Chicken Run Photo's 

Image 2
test shot, bluish setting withing the camera


 Image 3
adjusted image with blue gel on flash at 1/4 power

 Image 4
custom bracketing off, custom WB on with "incorrect" WB and blue gell still on flash 

Image 5
No flash, as you can see from this image here flash is very important when facing the sun 


So why bother, when there is photo shop, etc...

I've learned to live by those words of Frank Doorhof "why fake it when you can create it?" My chooise to create in camera permited me to save so much time. The only adjustment was made to the tone curves as I downloaded the images. No need to spend the time in photoshop or lightroom, the images where up on the web shortly after I finshed capturing them.

Learn to use your equiptment better, you'll be a better photographer with the confidence to boot. There is nothing worse than as a photographer finding myself in a situation where I don't know what to do, I find that the more I try different things the more confidence I have down the road in those tight situations.


You can find more from the album on Google plus here Chicken Run Photo's 

Wednesday, October 23, 2013

Shoot the Snoot, Advanced Techniques

Diffused, White, Black and Confused?


Just because we have the gear and spent our valuable dollars on it, doesn't mean we'll get the shot let alone know what to do with it.

In this Post I talk about how to use a snoot and look at the few albeit simple differences the slightest changes can make.

The first three images below produce dramatically different results, leaving the camera settings the same, the distance from the light source doesn't change either (about 5' from the end of the snoot). As with all the images from this post the only change was the way I used my snoot. And I'm about to share them with you.

The Top image has been made with a white snoot, typical results nothing to fancy, sure can tell they are fake silk flowers. I choose flowers for this example because of the many colors and edges in the image lots of contrasted areas between the highlights and shadows.

For the Middle image I used a diffused snoot. No, I've not placed a diffuser between the flash and the subject material, what is it then? 

I've made a snoot out of diffuser material, some of the light travels through the snoot but most of it gets diffused through the sides of the snoot and now become a little late and softer getting there, now I've begun to produce a more interesting look.


Top 


Remember you're not putting a diffuser over the flash or between the snoot and the subject, the end of the snoot stays open just as if you are using it normally.


 Middle


Now for a more extreme quality to my image. I've used a fully black snoot.

Take the Rogue Flashbender for example, its white on one side and black on the other, try using the black side for the inside of the snoot. It produces more contrasty image quality. Now I've got a much more interesting image, even for fake silk flowers, this end result is dramatic and fun. I've still got one more tip so keep reading. 

 Lower


Difference Between the Black and White snoot, zoomed slightly out.


A snoot is just a easier and much cheaper way to create a spotlight drama that you can get from stage lights and barn doors, it will be a great way to take photo's of the kiddos during halloween, and it doesn't have to be night out side either these where taken at about 2 o'clock in the afternoon right next to a window. 


Black

White


One last Tip for the Snoot Shoot!


I choose this clock for subject matter but I could have just used a plane backdrop, all I did with the snoot here is pinch the end a little and got this wonderful teardrop quality falloff from the light. Remember it's important to have the light coming from the same side as the pinched edge of the snoot. Here the light is just over my right shoulder and about 8' from the clock. 

Keep practicing and Happy Shooting. I look forward to seeing some of the interesting images you can create, feel free to share your results and post them in the comments below.